Installing Zest on WordPress
Zest ships as a WordPress plugin for sites running WordPress 5.2+ and PHP 7.4+. No theme edits, no script injection, no CDN snippet - everything is configured from the WordPress admin.
At the moment the plugin is distributed through GitHub releases while the WordPress.org directory listing is in review. Both are the same package.
Install the plugin
Nothing exotic here - the same flow as any plugin zip:
- Download the latest
zest-cmp.zipfrom GitHub releases - In your WordPress admin, go to Plugins → Add New → Upload Plugin
- Choose the zip, click Install Now, then Activate
Alternatively, unzip zest-cmp.zip and upload the folder to /wp-content/plugins/ via SFTP, then activate it on the Plugins screen.
Once activated, a new Settings → Cookie Consent entry appears in your admin menu.
The settings screen
Open Settings → Cookie Consent. Two tabs: Overview shows a live preview of the banner as your visitors will see it - change any setting and it updates about 600ms later. Click Replay banner to re-trigger it. Settings holds everything else.
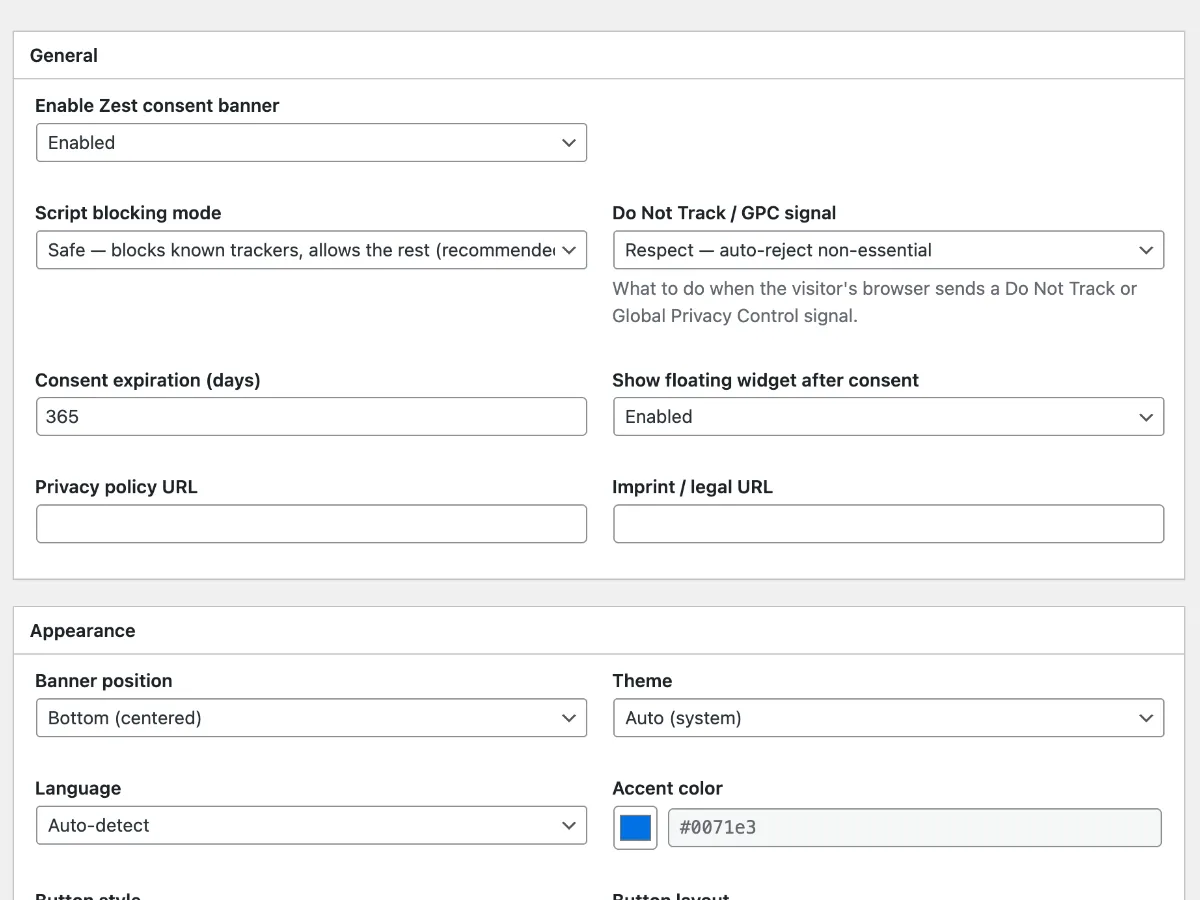
The fields, top to bottom:
| Field | What it does |
|---|---|
| Enable Zest consent banner | Master switch for the front-end banner |
| Script blocking mode | safe blocks known trackers (recommended), manual blocks only what you list, strict blocks everything until consent, doomsday blocks all scripts unconditionally |
| Do Not Track / GPC signal | Auto-reject non-essential cookies, preselect in the modal, or ignore the signal |
| Consent expiration (days) | How long a visitor’s choice stays valid before they’re asked again |
| Floating widget | Reopens the consent settings after the banner is dismissed |
| Privacy policy URL / Imprint URL | Linked from the banner |
| Banner position, theme, accent color | Appearance - theme auto-follows the visitor’s system preference |
| Button layout | Row, split, or split-modern |
| Language | Auto-detected from the visitor’s browser, or pinned to one of 12 built-in translations |
And the preview pane itself:
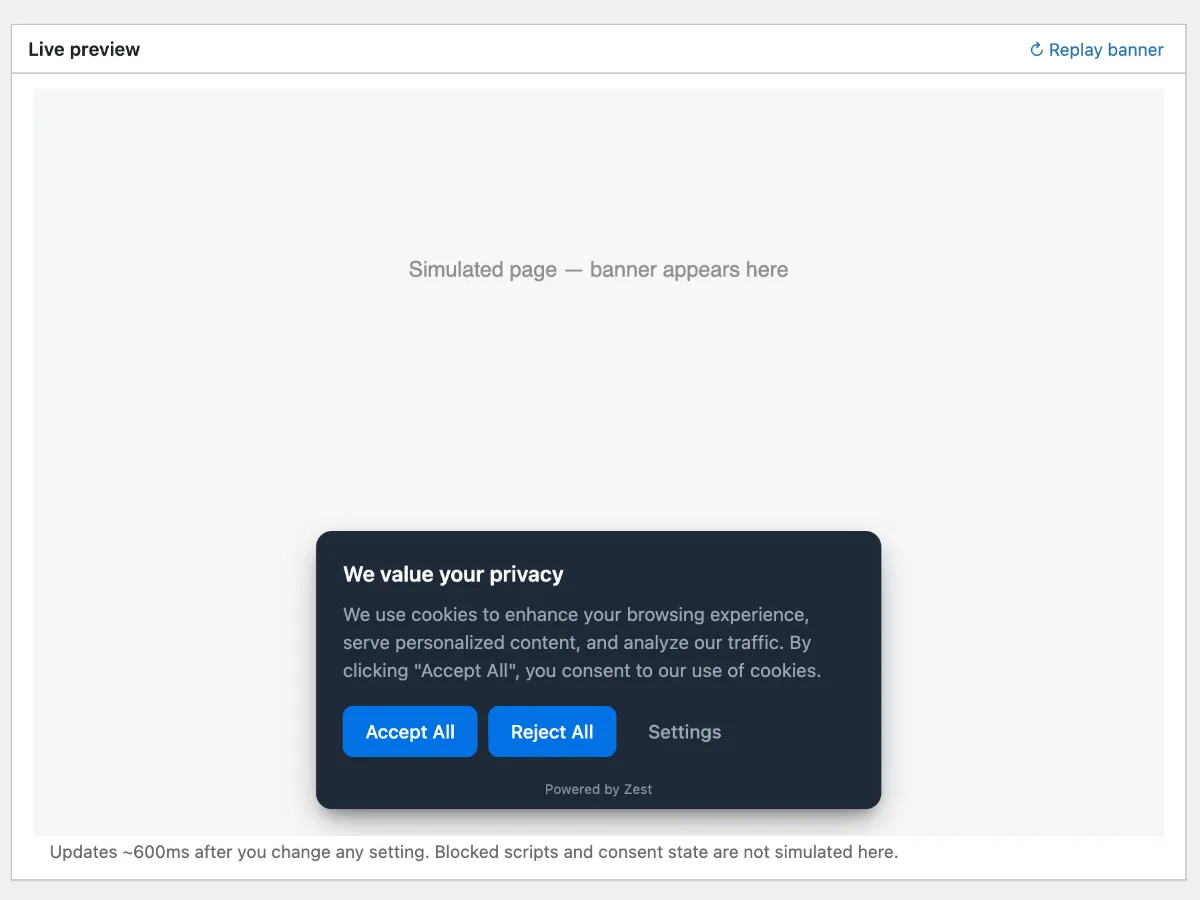
Changes take effect immediately - the live preview updates about 600ms after any change.
What the plugin adds to your pages
On activation the plugin injects two things into your site’s front-end:
- The Zest bundle (
zest.js) - the same zero-dependency library behind the CDN install - A small inline
window.ZestConfigobject with your settings - no secrets, no remote calls
Script blocking, cookie interception, and the Shadow DOM UI all behave exactly as described in Script blocking - the plugin just replaces the manual <script> tag with a settings screen.
Caching plugins
The config is printed inline on every page, so page caches (WP Super Cache, W3 Total Cache, LiteSpeed, Cloudflare) are fine - purge them after changing settings so the new config reaches visitors. If your host aggressively minifies or defers scripts, check that zest.js loads before your tracking scripts; the interceptors must install first.
Uninstall
Deactivate and delete the plugin as usual. On uninstall, all plugin options are removed from the database - nothing is left behind. Consent records set by the Zest bundle follow the expiration you configured.